
HOW TO BUILD A SOUND ABSORBING PANEL IN 5 EASY STEPS
There are a lot of how-to articles and videos on the net about building acoustic panels for your studio or control room. They're really handy additions to any environment that requires less acoustic reflections and they're cheap and easy to make. I need mine to tighten the acoustics of the listening position in the room I'm currently in. Generally I'm sound designing and mixing commercials for TV which can be less forgiving when it comes to quality control than mixing music. My goal is to make more of these with bass traps also but for now I just built two panels that will be placed at the left and right mirror points from my speakers. Quite honestly, the way in which I built these is not that different to everything else on the interwebs except I did mine in 100-degree weather with a PBR in hand in about 2 hours for $22 per panel. My point is that this is easy to do and shouldn’t be a grueling or tedious process.
What You’ll Need (for two 2’x4’ panels):
Materials:
2 yards 60” wide fabric (I used duck canvas but burlap is fine/cheaper)
2x 2’x4’x2” Roxul Mineral-Rockwool 60 Insulation (cheaper version of Owens Corning 703)
Wood glue (optional)
Staples
4x 330ml cans PBR
Tools:
Drill
Small drill bit for pilot holes
Cross-head screwdriver bit for drill
Saw (handheld or electric if you can beg/borrow/steal one)
Tape measure
Staple gun
Serrated knife

1. Cut The Wood
Getting 8-foot long wood boards makes things nice and easy for cutting. If you’re making 2’x4’ panels I think you guess where I’m going with this. Cut 2 boards in half (4’ each piece) and 2 boards in quarters (2’ each piece). I went to Home Depot for my lumber and hardware and they cut for free so it saved me the job. Note that the cheap boards can be warped so find the straightest ones you can that aren’t twisted or bent. When I got them cut the boards turned out to not all be 8’ exactly so just make sure the guy measures 4’ and 2’ respectively per cut on each board otherwise the last piece of each board may be long or short.
2. Build Frames
Gather all the materials and tools, crack an ice-cold beer and maybe stick on a motivational playlist. The next two hours are going to be fun.
Place your wood up to each other with the 2’ pieces on the inside so the total length of each panel will be 4’ (not 4’2”). This just makes trimming the mineral-rockwool slightly easier.
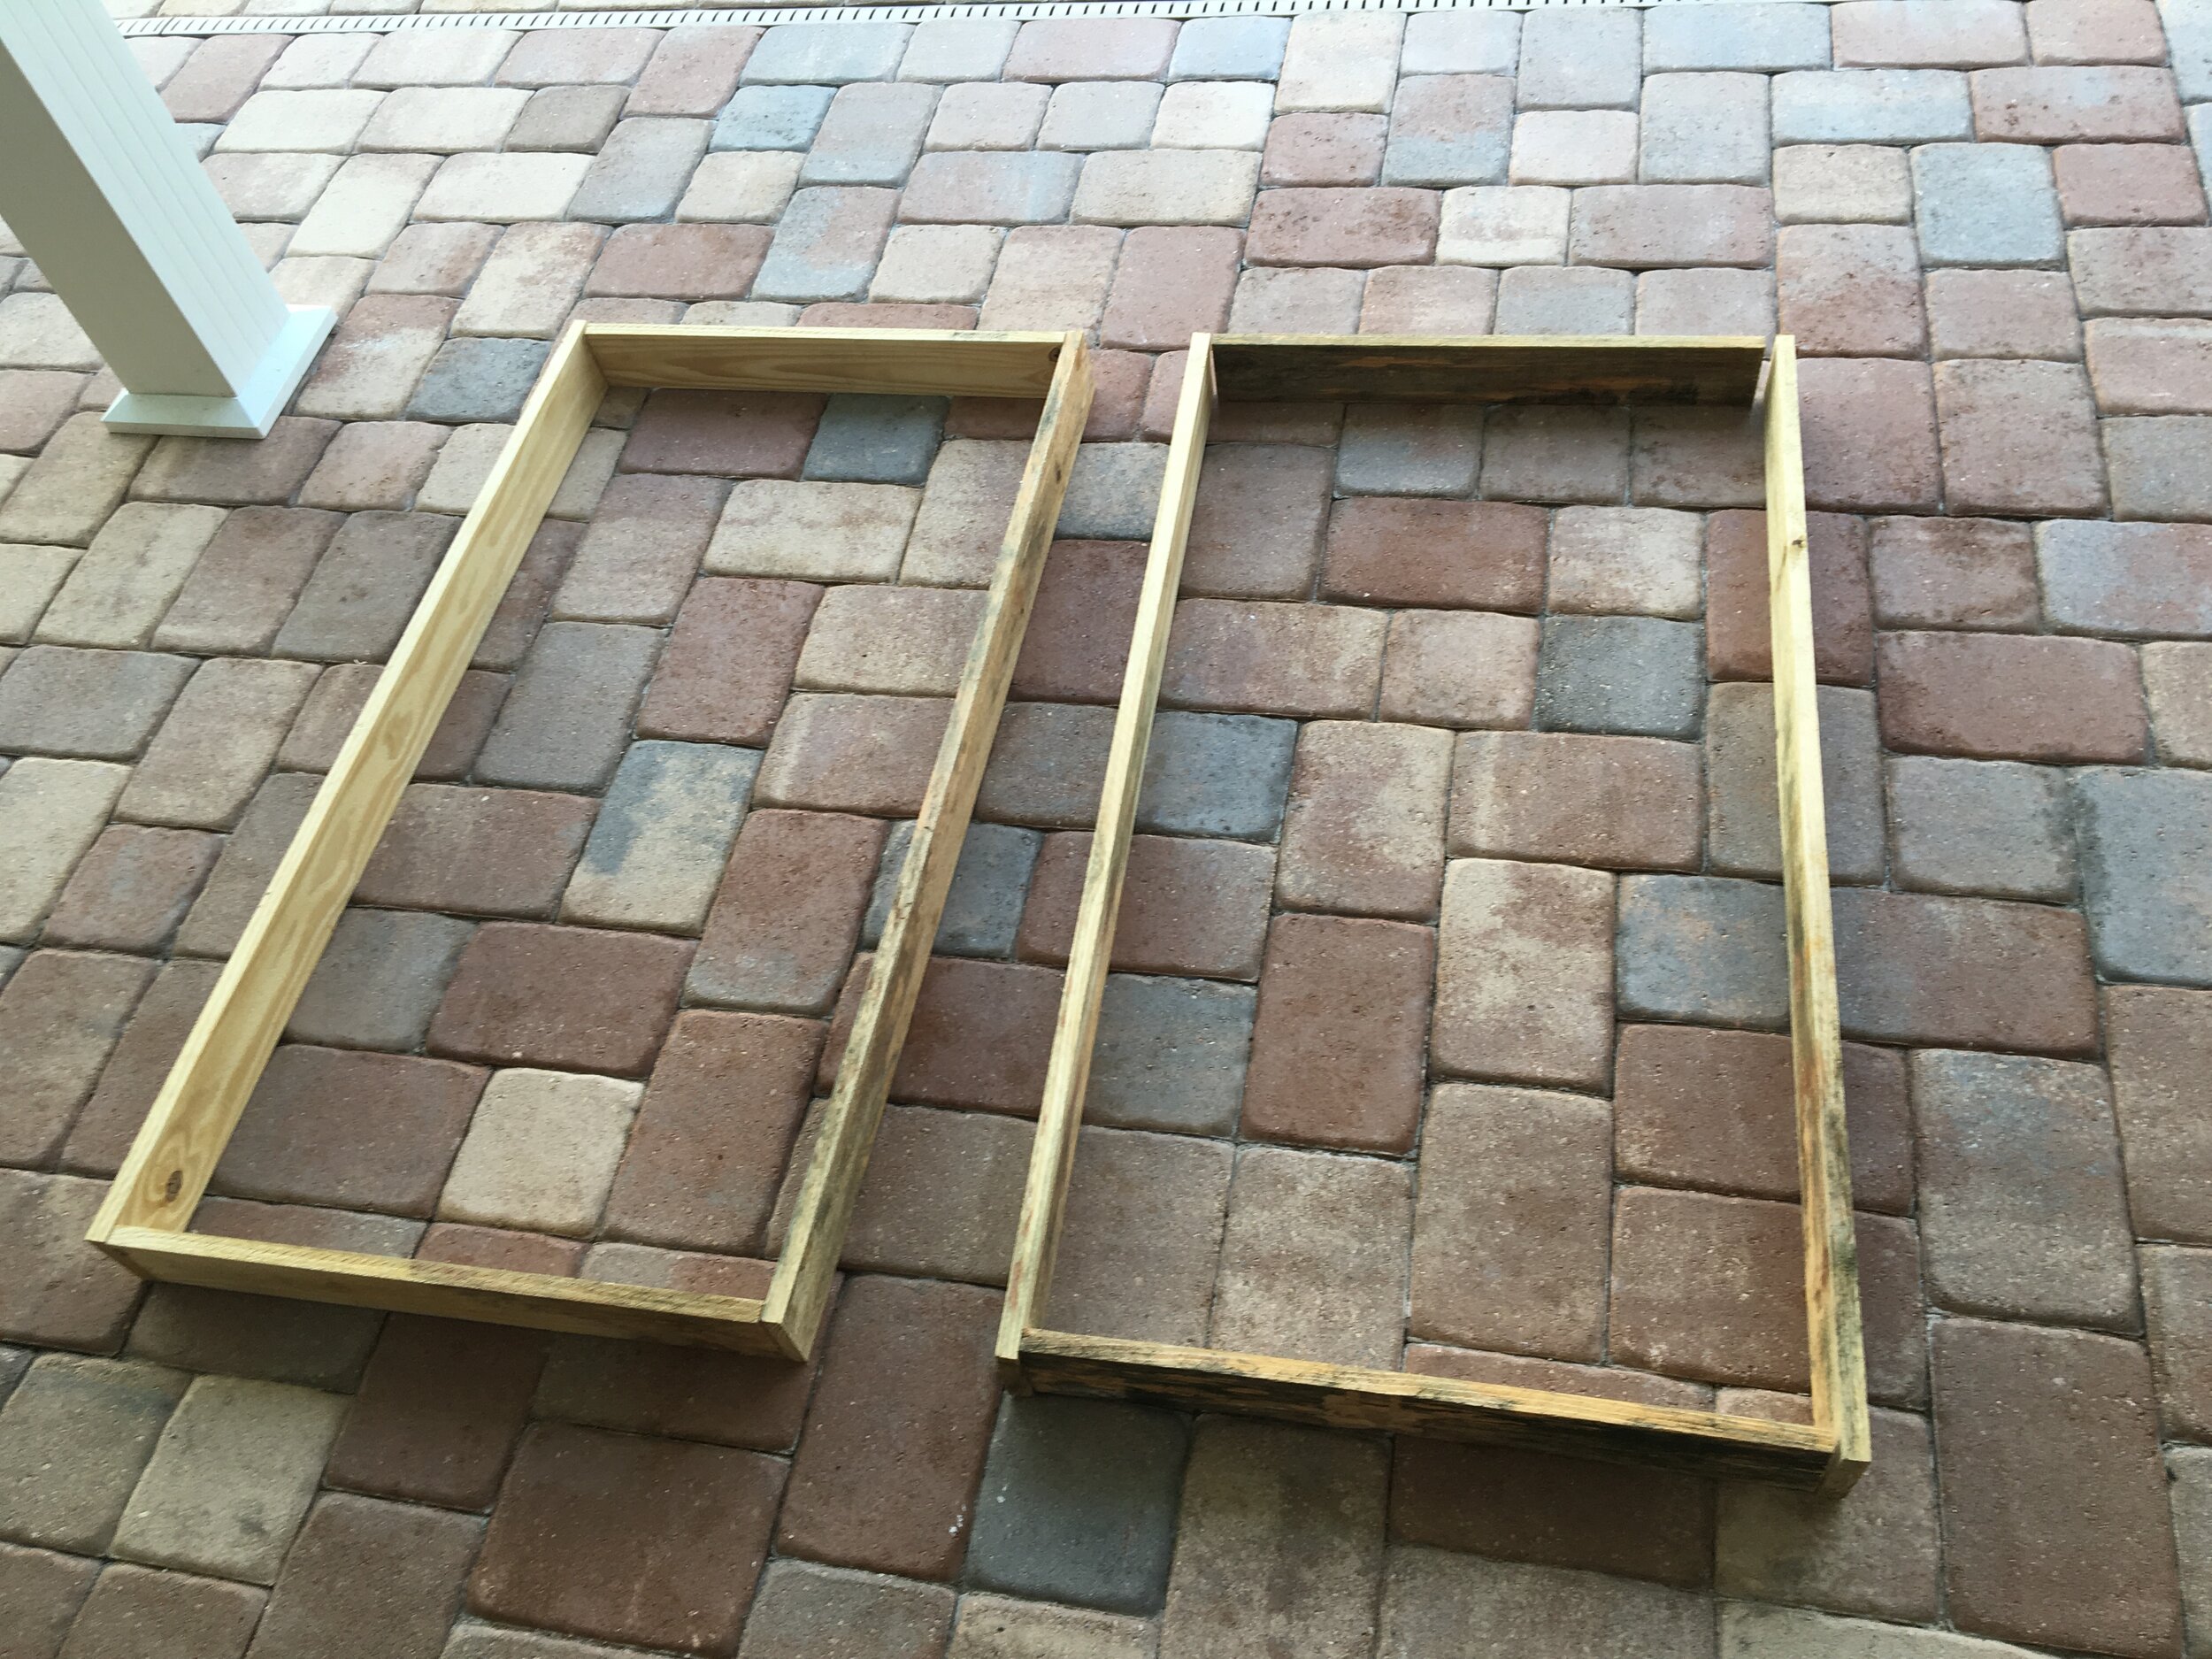
Drill two pilot holes at the top and bottom of each 4’ piece. This is obvious but make sure the holes are roughly half an inch from the top and bottom of the board. This means the screws go into the middle of 1” thick boards.
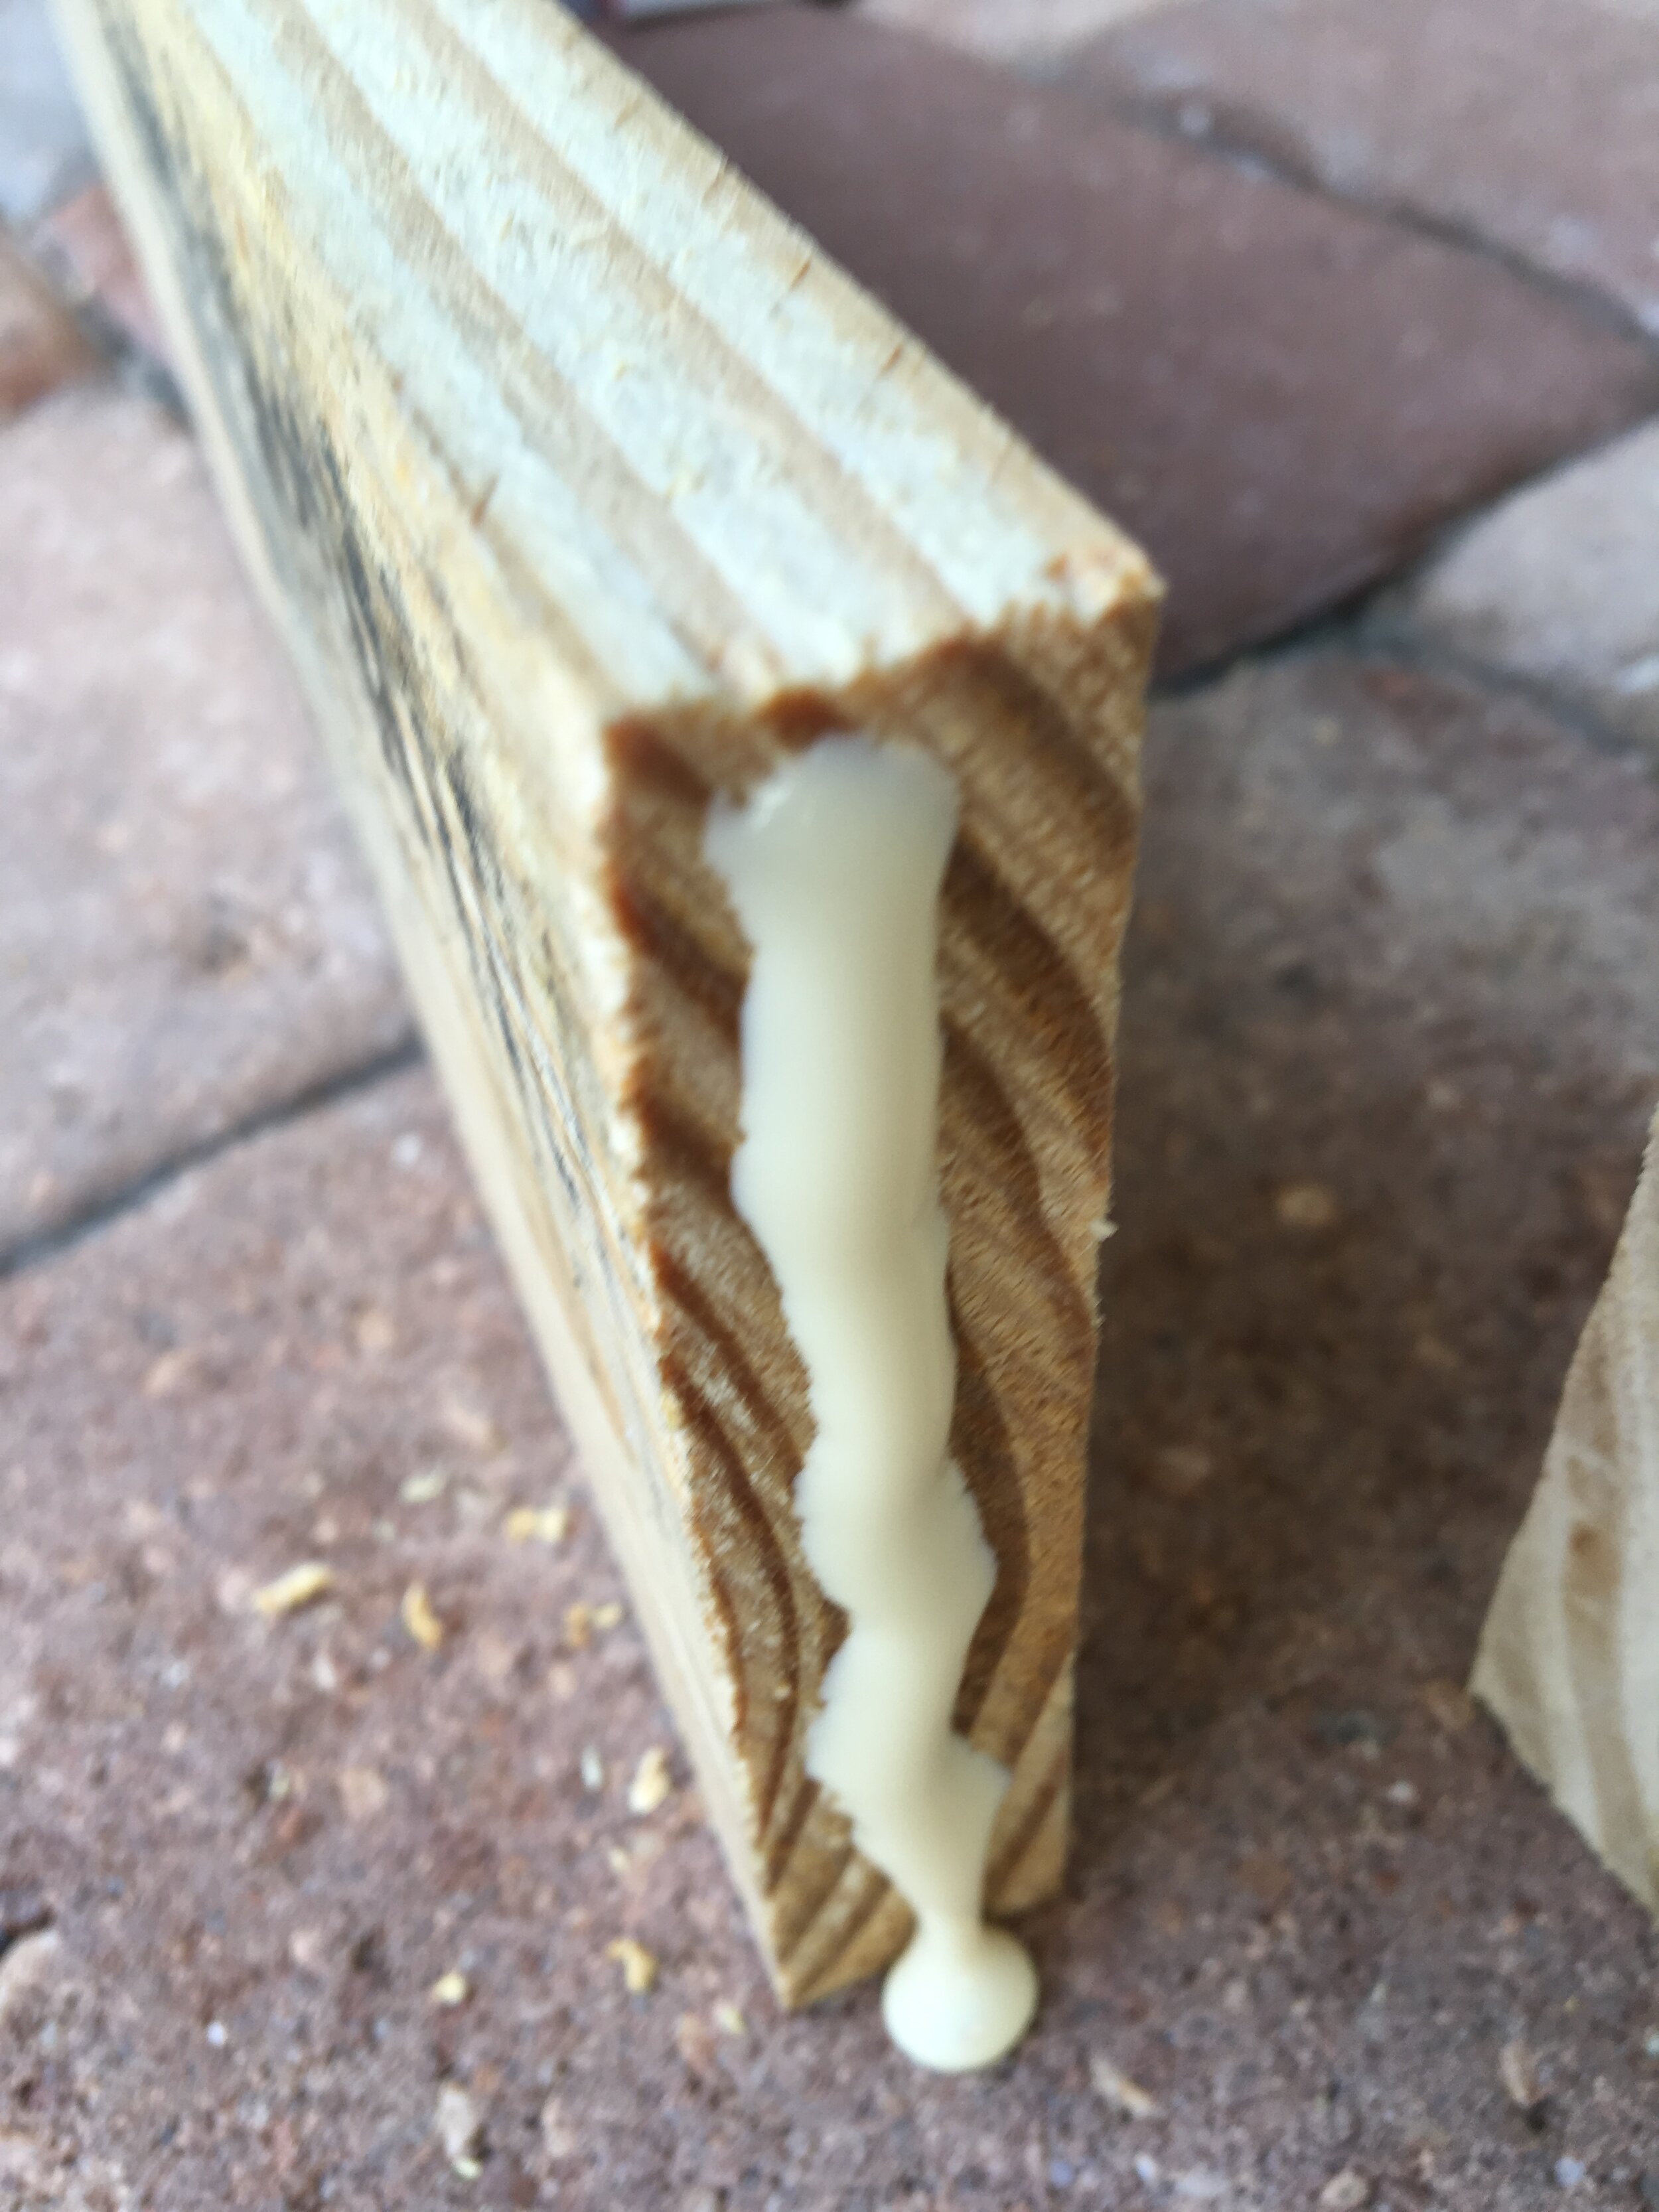
Add wood glue for extra strength if you like before driving the screws with the drill into each piece. The frames will be strong enough without it but I was just over strengthening.

Do this to all your corners and you should have a basic four-sided frame like this:


Perfect beer holder...
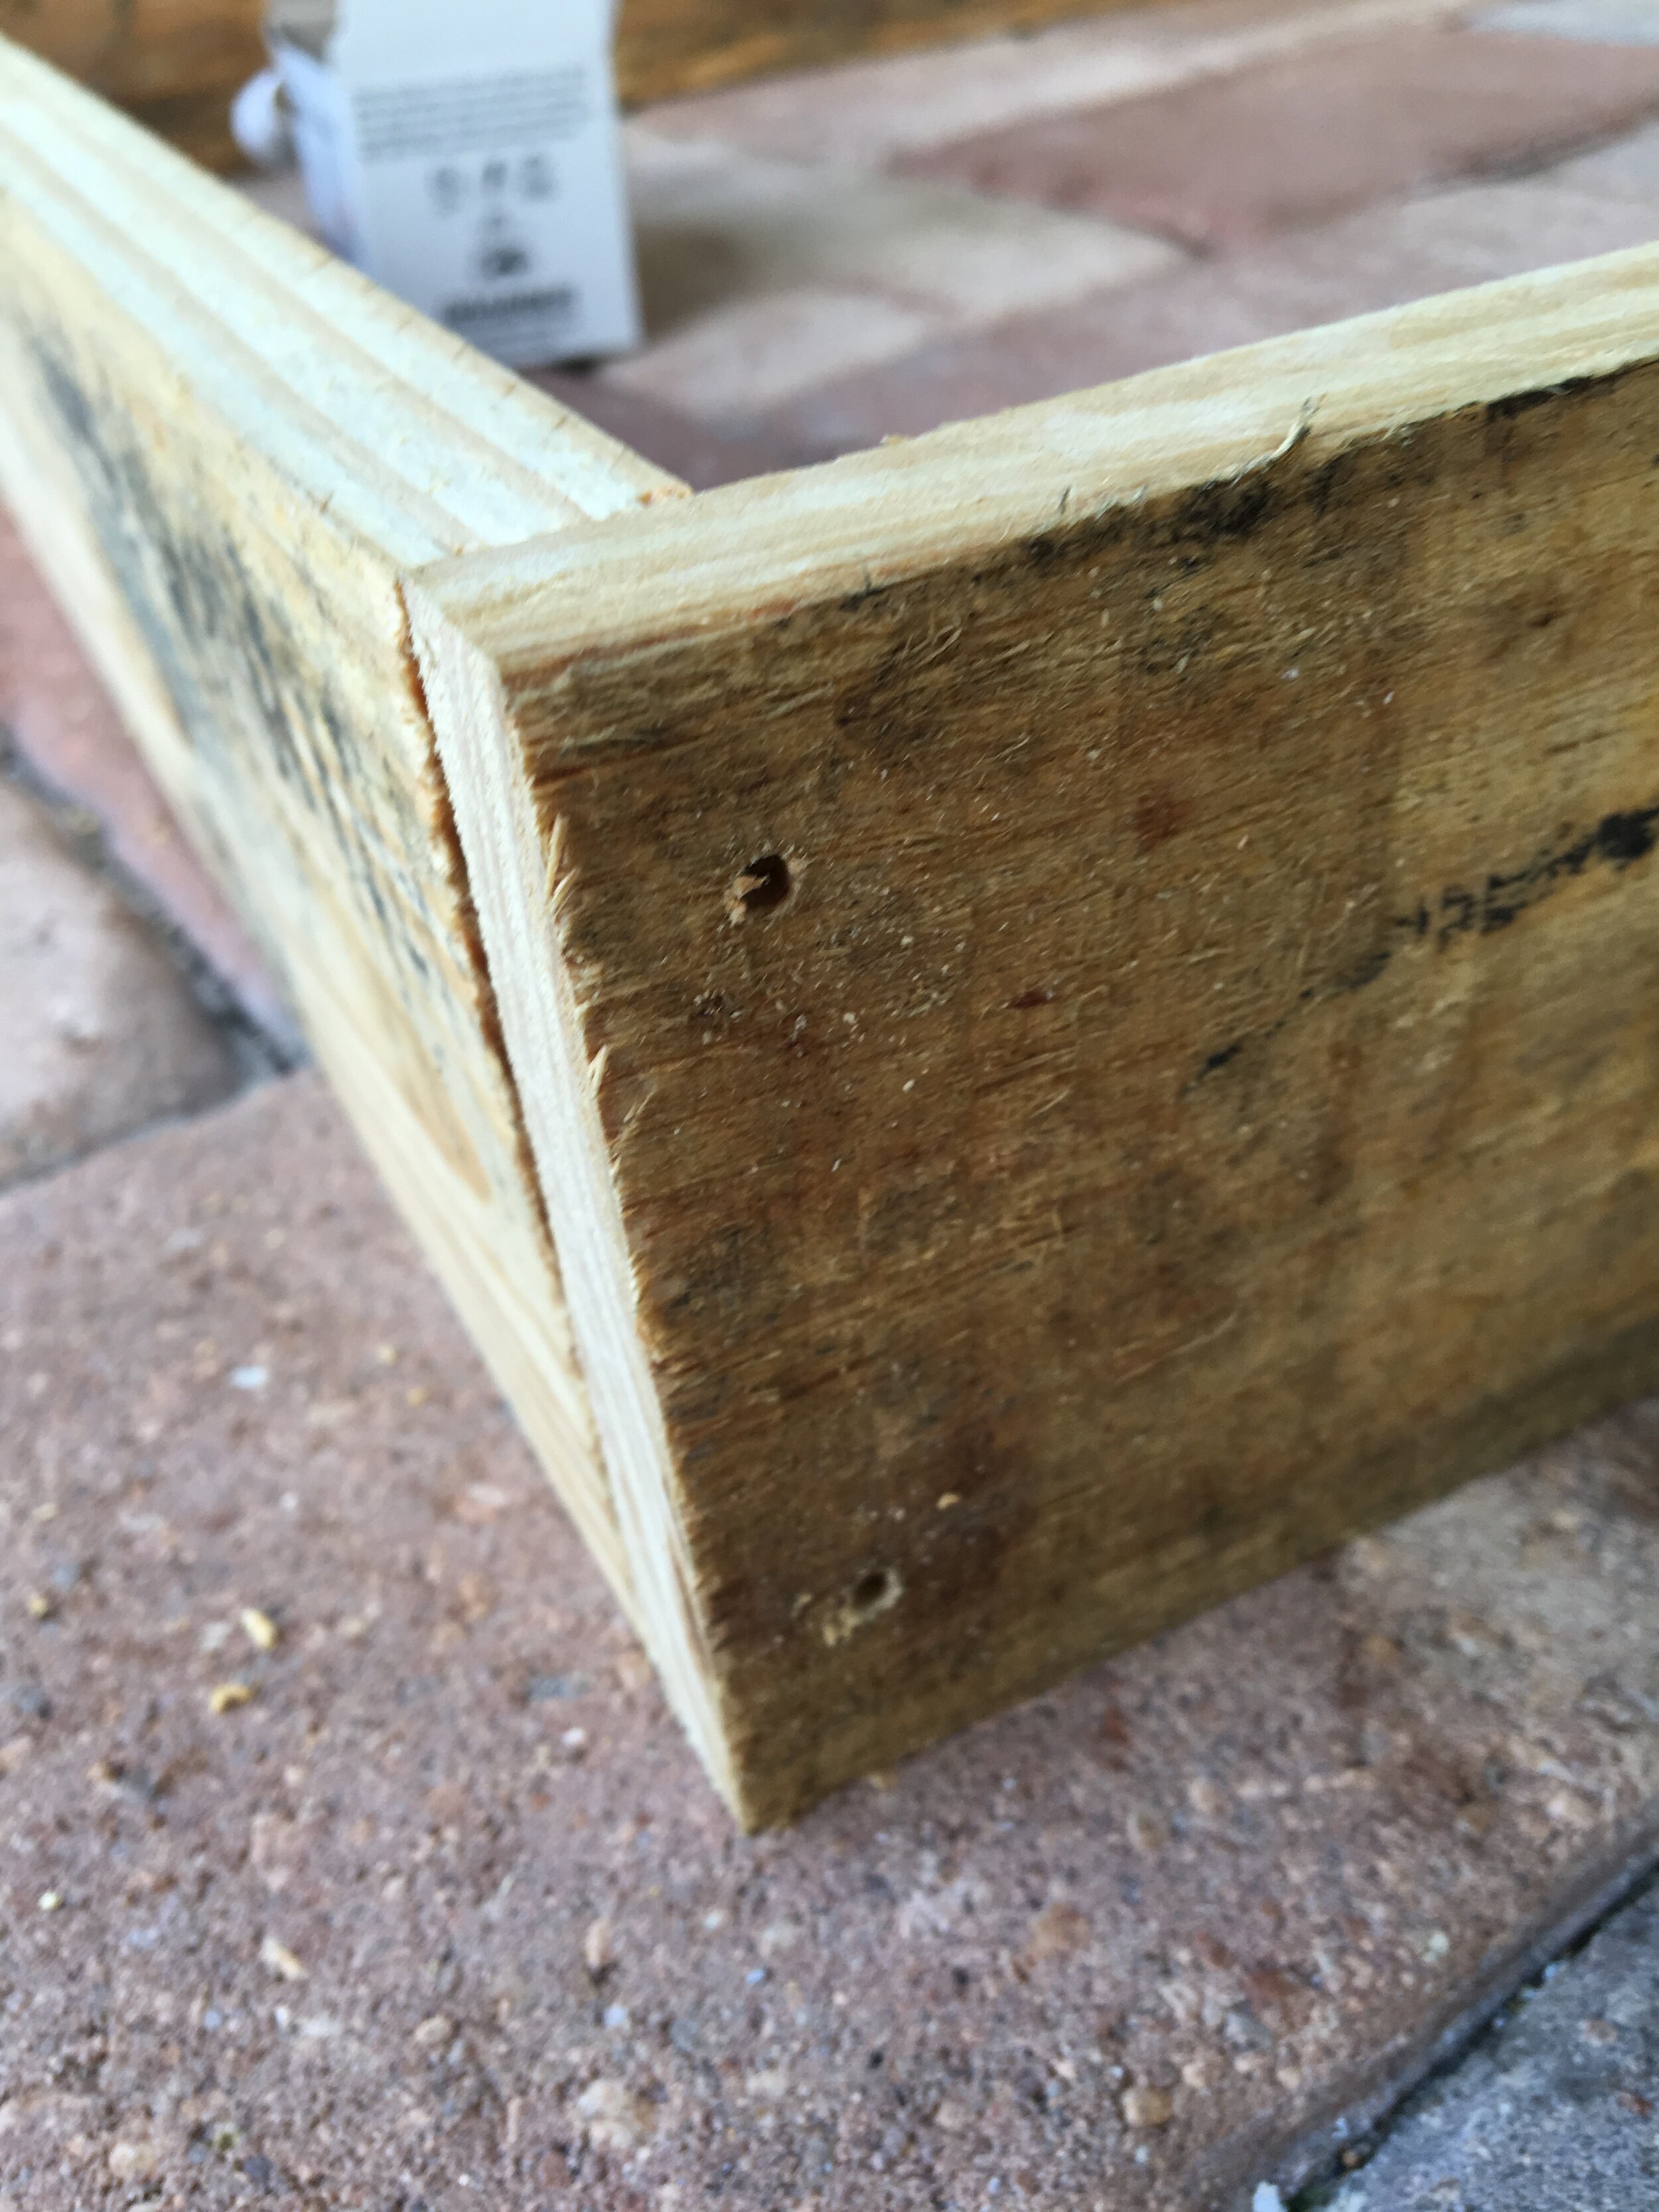
3. Reinforce Frames
This step serves two purposes; reinforcing the overall strength and sturdiness of the frame, and creates a placeholder for the insulation.
I took one of the 2’ pieces of wood and placed it in the middle of each frame. Roughly measure 2’ from the top of the panel on each long side to get the halfway point. Then, drill 2 pilot holes 2-1/2” down from what will be the front of the panel so that once in place, the 2' piece of wood will sit 2" from the front of the panel (see picture below). Do this on both long sides. The idea is that the insulation sits flush with the front of your panel. Again I glued the ends before screwing in place.

I added corner pieces so the insulation sits flush in the corners giving extra strength to the frame without adding loads of weight to the panel. I nearly killed myself cutting these 45-degree triangles by hand with a blunt saw in 100° F weather so I recommend using a circular saw or jigsaw if you can get your hands on one. I simply used a leftover bit of wood and drew 45-degree right-angle triangles as a guide.

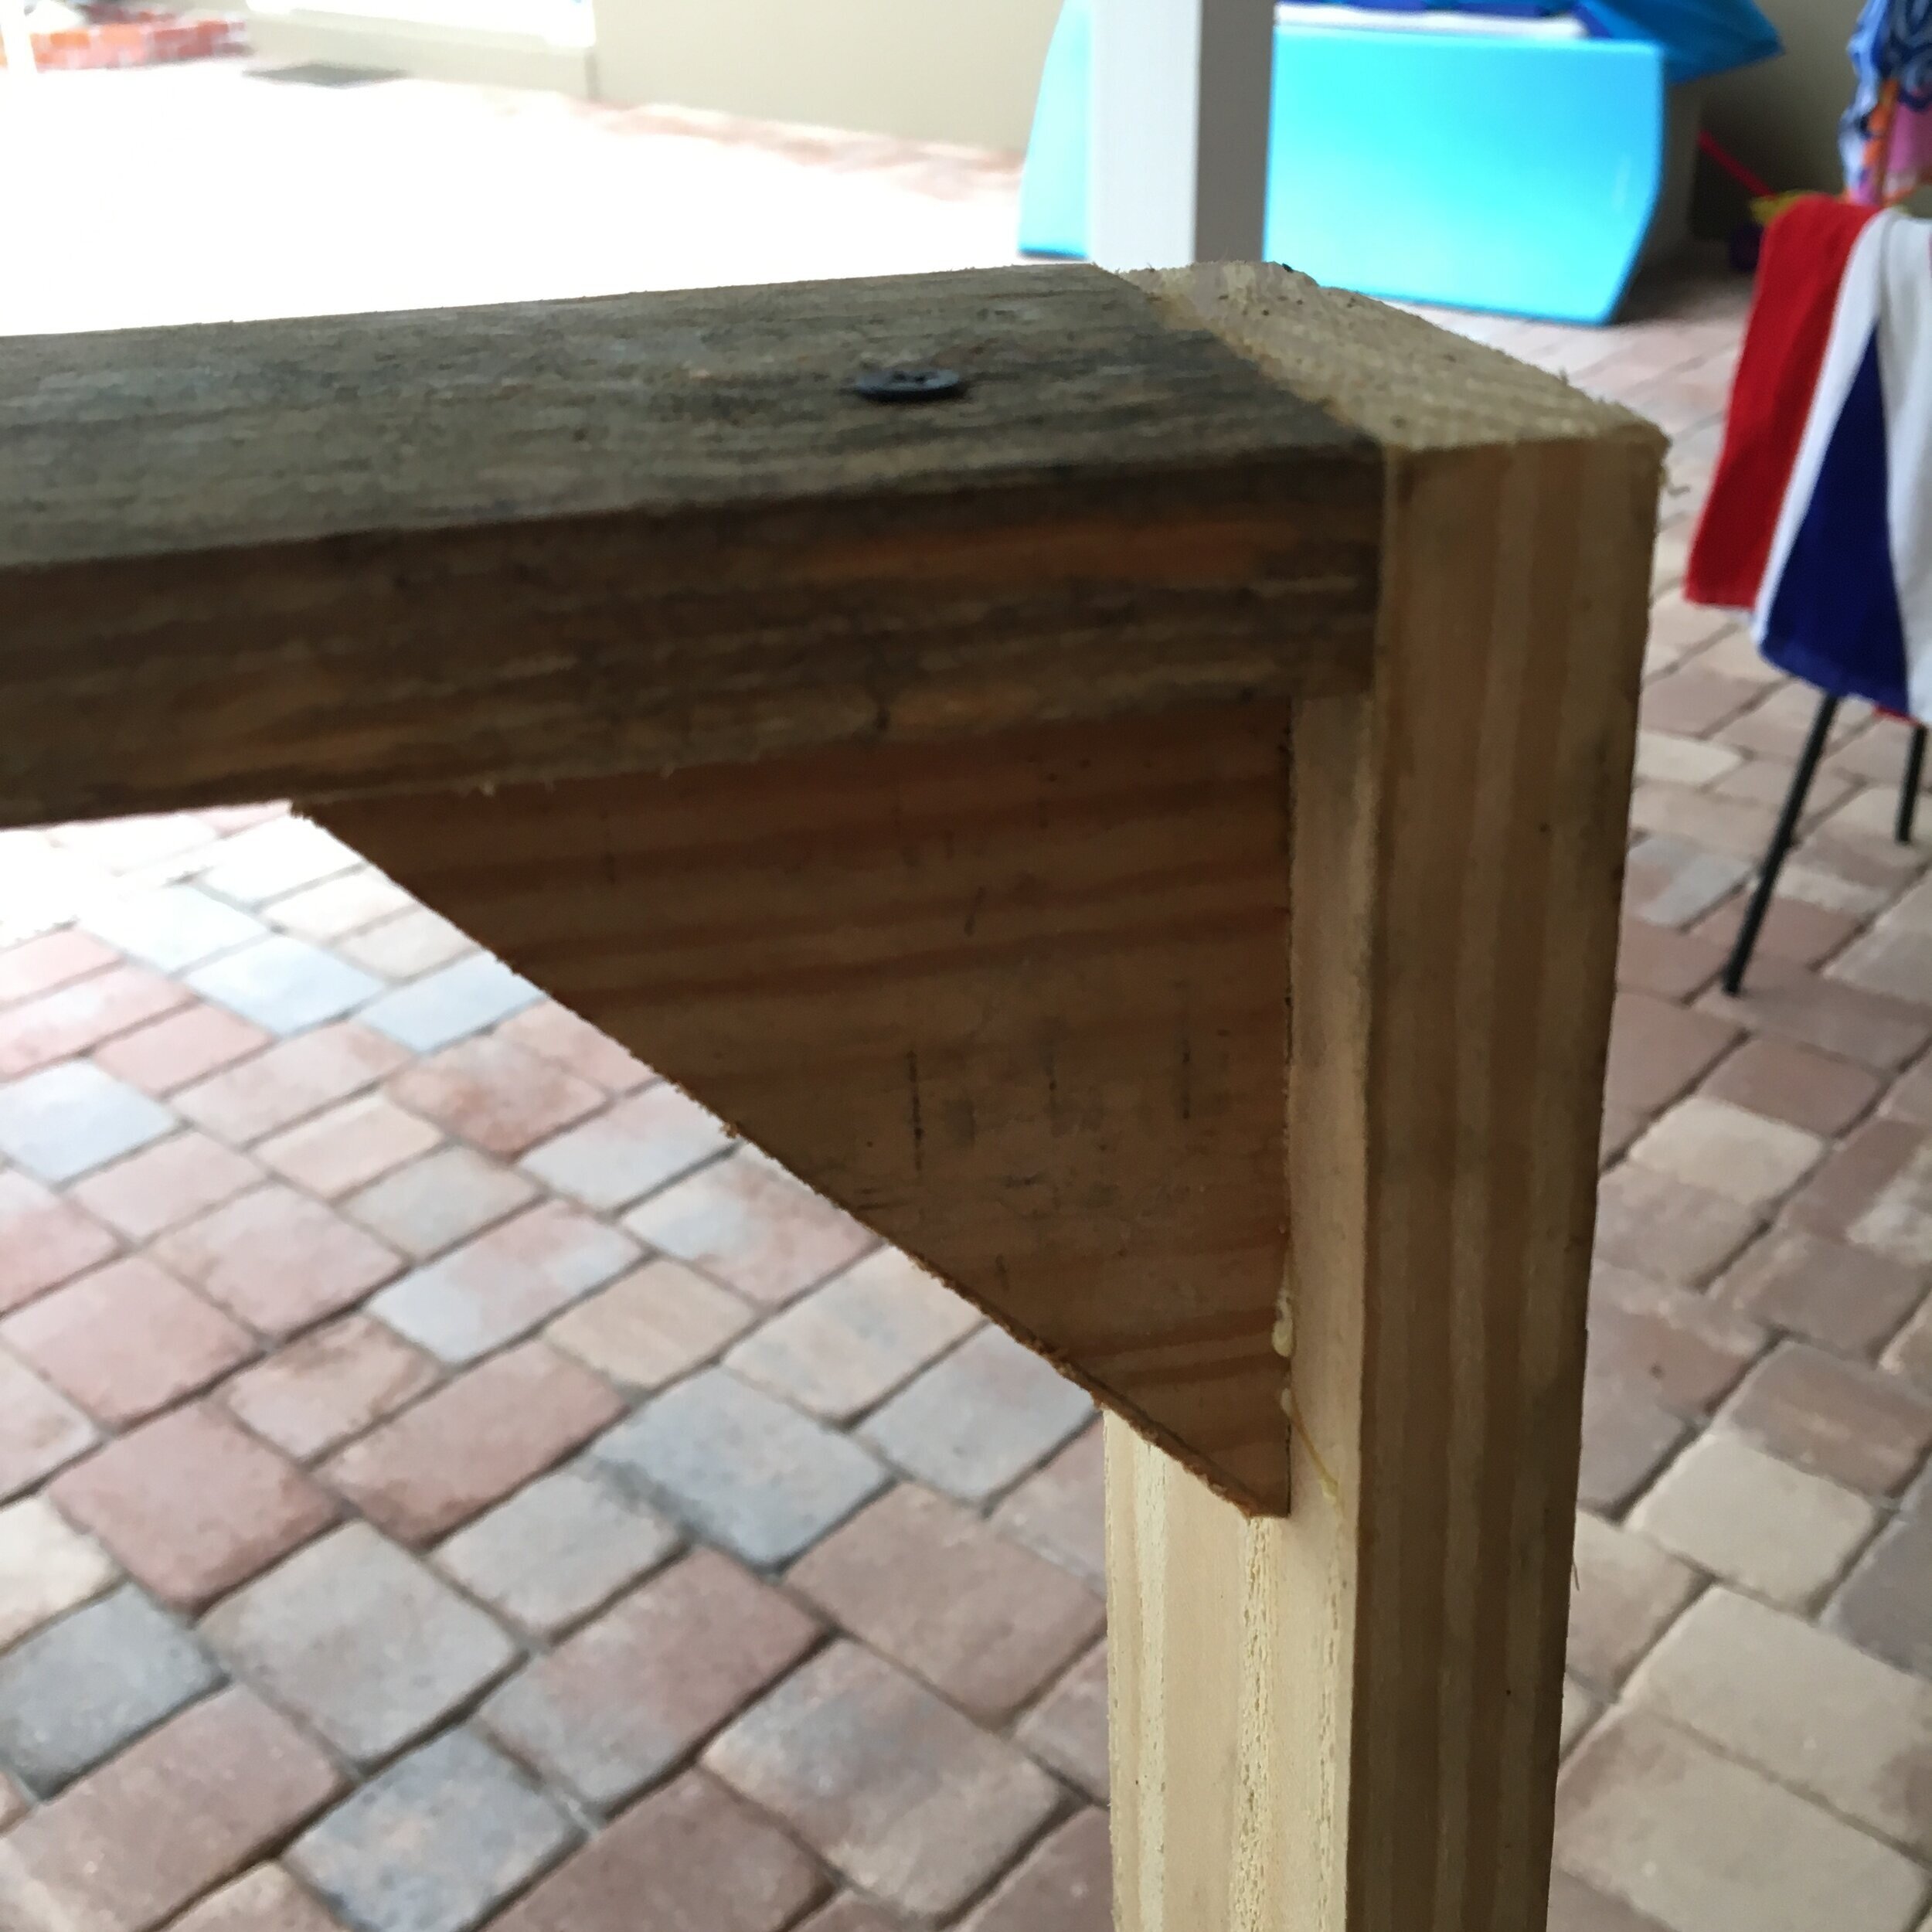

The same deal applies to these triangles as the centre board we just inserted. Place them 2” down from what will be the front of the panel to allow for flush insulation once we get to that stage. I glued and screwed with just one screw per side, per corner.
4. Cut Insulation To Size
You should be empty by now so crack another PBR and get your gloves on if your perfectly moisturised hands are delicate like mine. I purchased Roxul Mineral-Rockwool 60 2’x4’x2” panels. These are just as effective as the generally preferred Owen’s Corning 703 panels of the same size. Roxul was a little cheaper and I found it was more available than Owen’s Corning but either work perfectly. I only found one place online that sells them individually but I will make more in the near future so it was far better value to just get the standard box of 6.
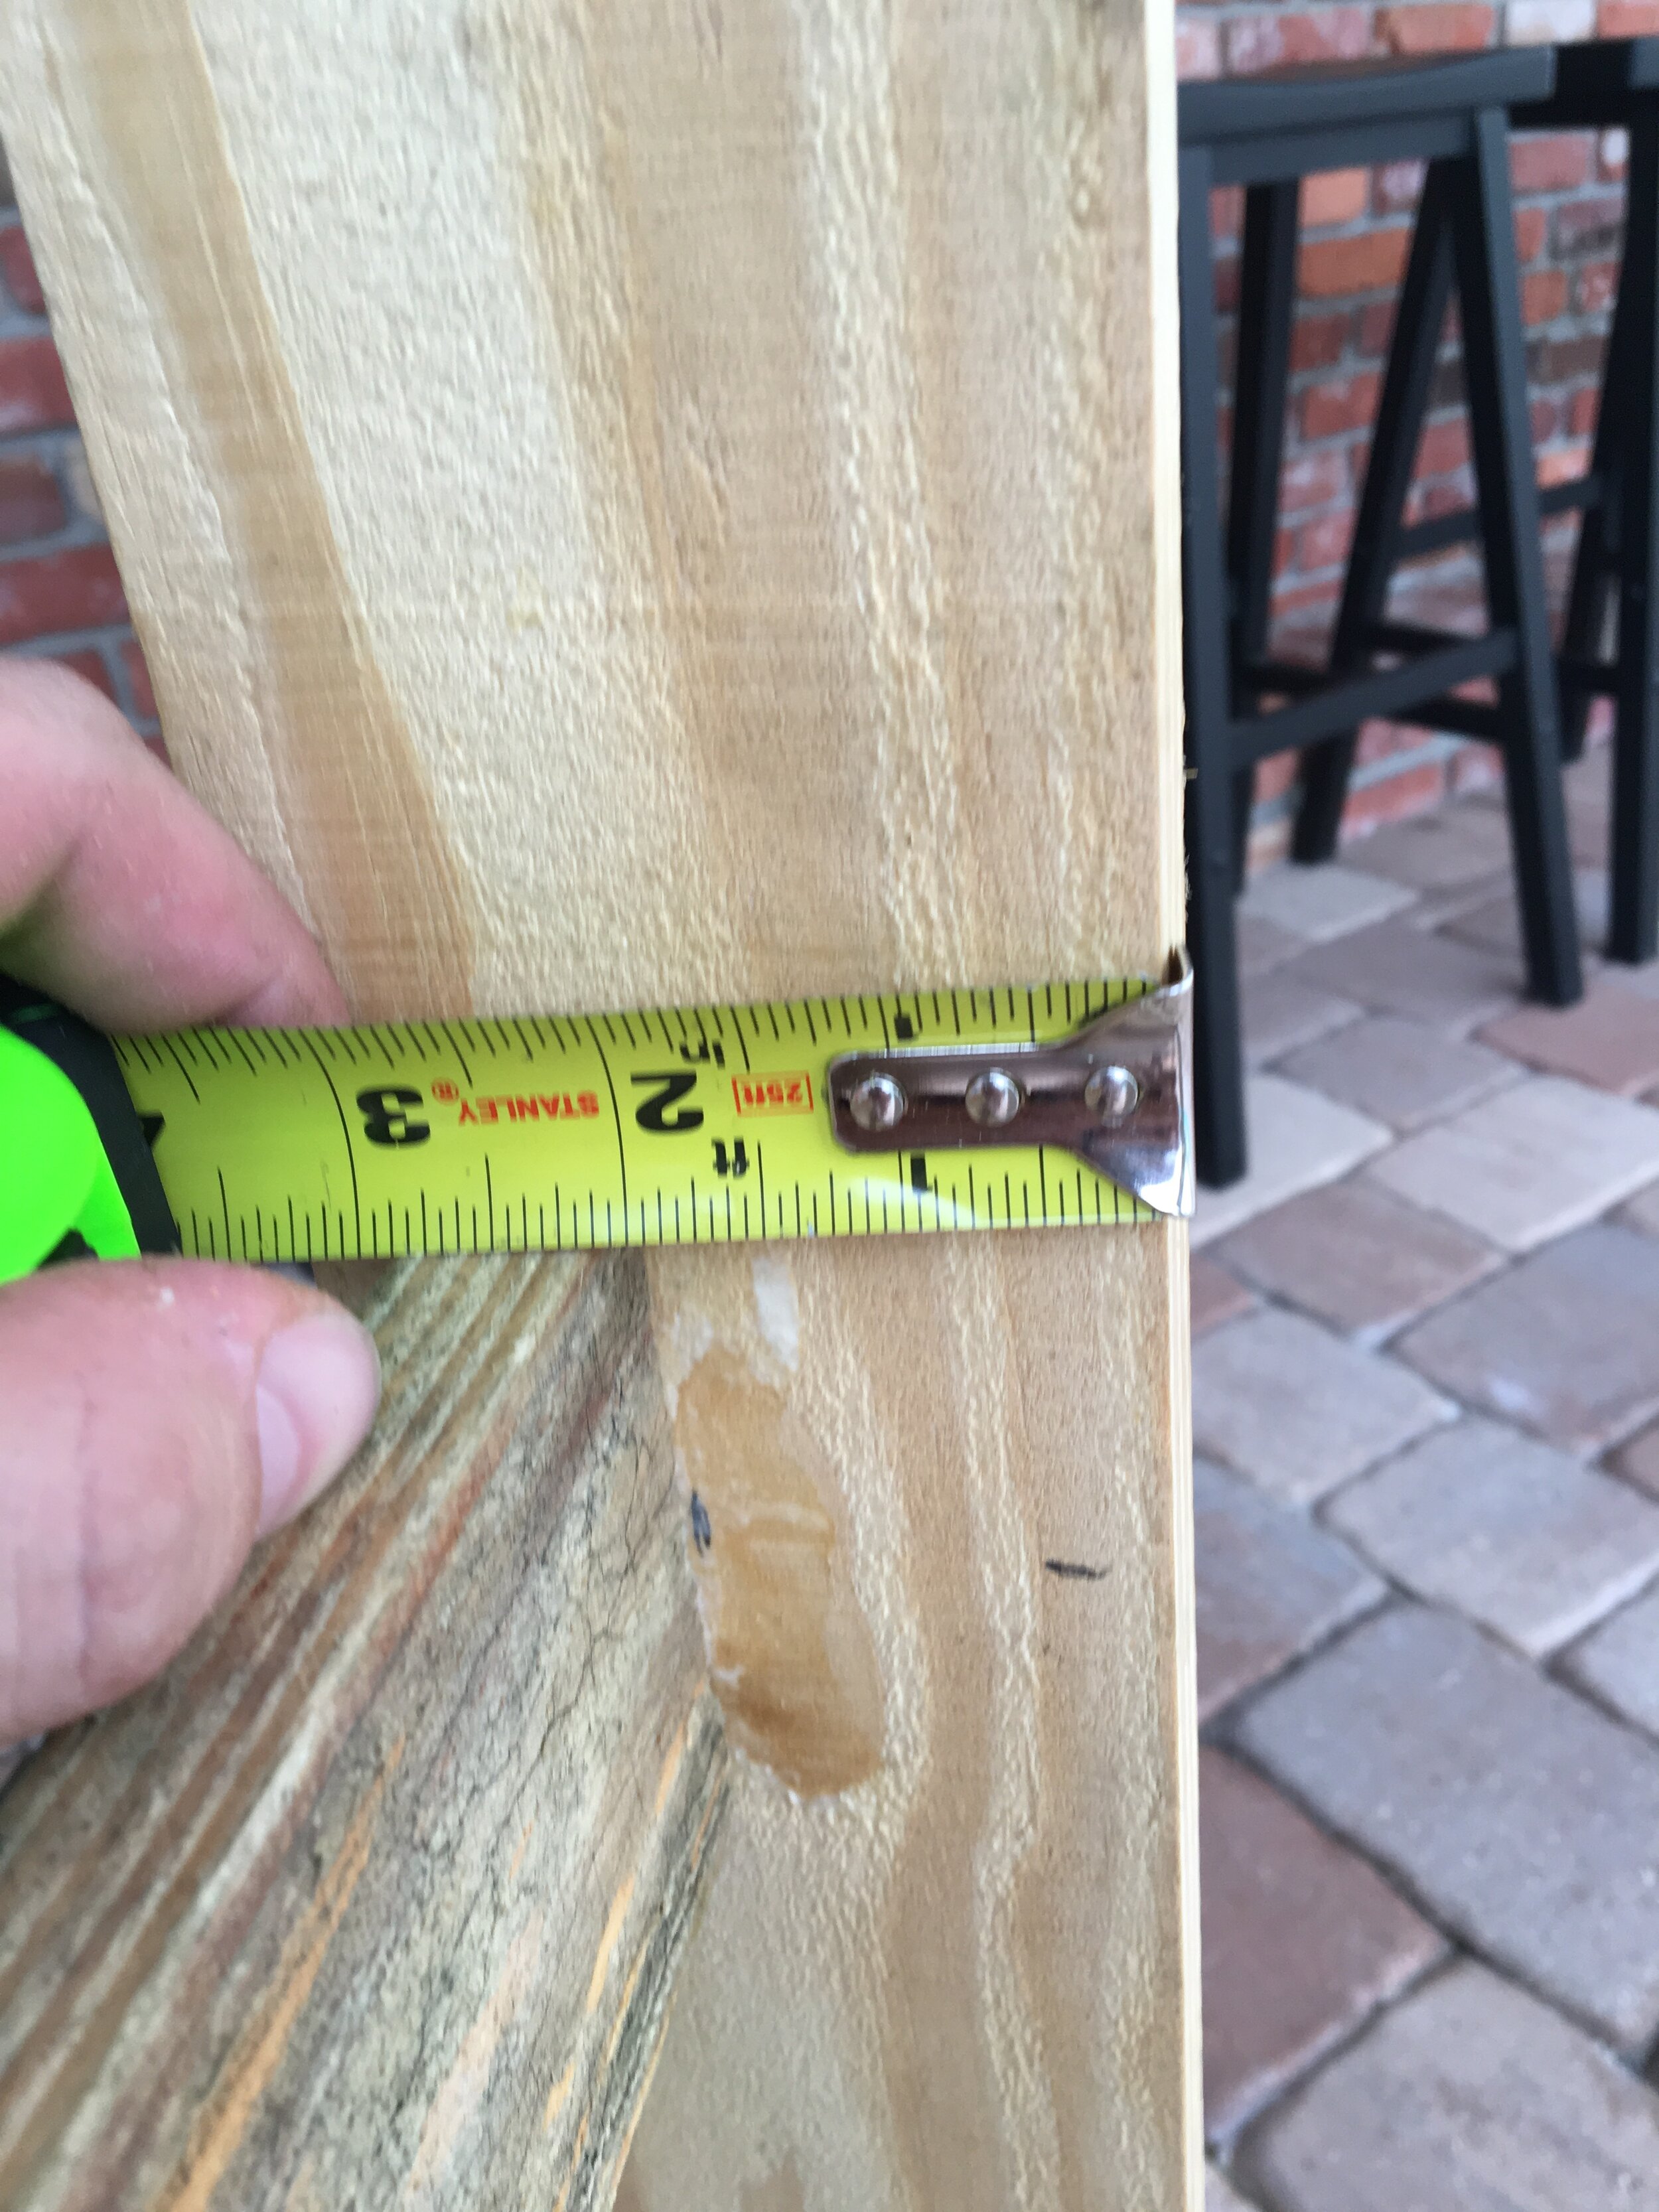
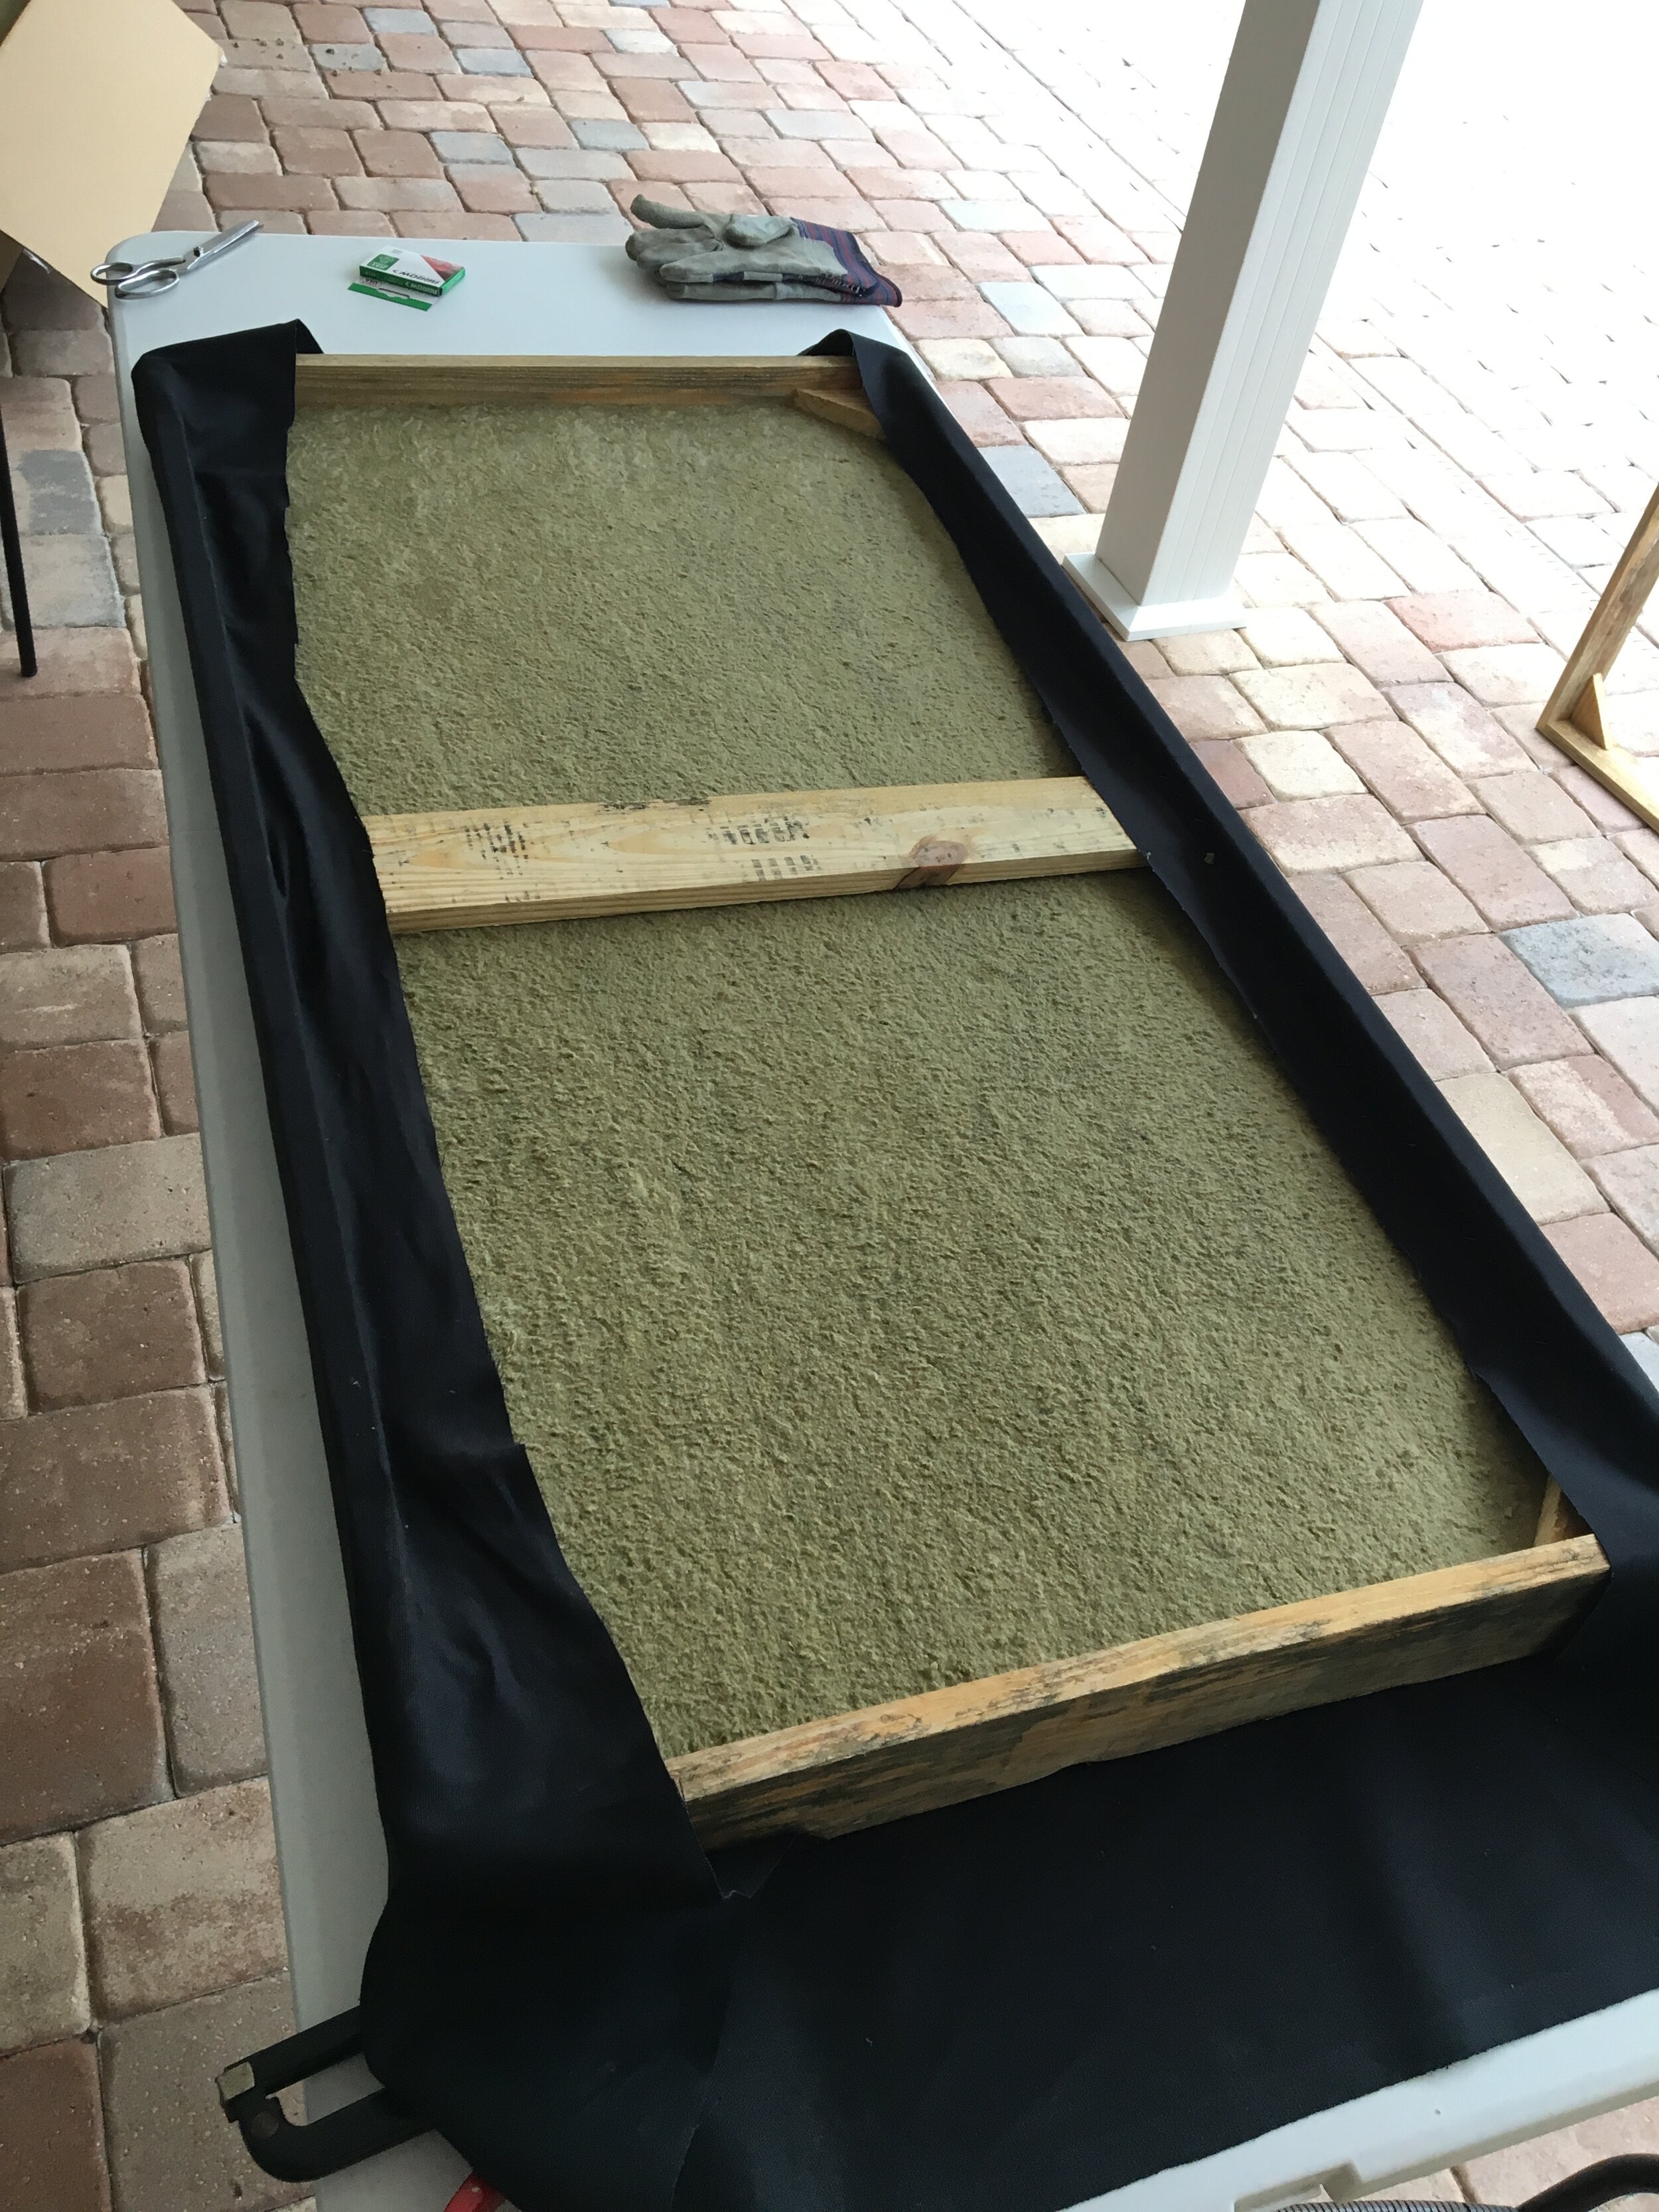
Our frames are now exactly 2’ wide. The insulation is also 2’ wide. In theory the insulation should fit nice and snug width-wise. In truth, mine did not! This is because of inaccurate cutting at Home Depot but I’m not blaming the guy, he had a huge queue of people waiting and did give me a disclaimer that it wasn’t going to be precision cutting. Not a problem though, using a serrated knife it cuts very easily so I just trimmed half an inch down the long side.
Assuming your panels are cut to exactly 2’ then you should be fine. However, the length will be 2 inches off. Remember: the longest side of the panel is 4’, the 2’ boards are inserted on the inside and they are 1” thick each. 4’ minus 2” is 3’10”. The insulation is 4’ long hence the need to trim. Of course you could buy longer wood and make sure the inside measurement of each frame is 2’x4’ but that involves more wasted wood and extra expense.

5. Wrap With Fabric
I looked into Guilford of Maine burlap. It’s very nice looking and supposedly has good acoustic dampening figures. This comes at a price though: $19 per yard! By all means use this material but I’m not that precious. I’ve worked in plenty of Dolby Certified control rooms that don’t have Guilford of Maine lined walls so I personally don’t think the acoustic properties of the thinnest part of the panel makes a huge difference.
I will say that I was going to go for the $2.99 per yard black burlap but it looked kind of scruffy to me so I delved deep and splashed out on $6.99 per yard Duck Canvas in black. It looks cool as shit and its really durable so I think it will last. Check the fabric width too; I saved money by getting a 60’ wide fabric meaning I only needed 1 yard per panel.
Lay the trimmed insulation in the frame so it’s flush with the front of the panel (it should be perfect if you put the inner frame pieces exactly 2” down from the front). Lay the completed frame on top of the laid out fabric on a flat surface. Make sure there’s enough fabric on all 4 sides to substantially wrap around the sides and staple to the inside of the frame.

Should've really put the insulation in the frame first...oops.
Staple the first long side, move to the opposite side pulling the fabric tight before each staple. Leave the corners for now and staple the top and bottom always pulling tight to ensure there’s no wrinkles or bubbles.


The corners are a little tricky and it’s hard to describe but essentially think of wrapping a present. I know what you’re thinking…”I’m crap at wrapping presents”. Well, me too but you get this down and you will never fear Christmas again. Bottom line: Fold the fabric as neatly as you can in the corners and staple back tightly.


The back of each panel now looks pretty crap so you can choose to cover with more fabric if you like but I’m pretty certain nobody will be judging my mix work by looking behind my acoustic panels…just saying.

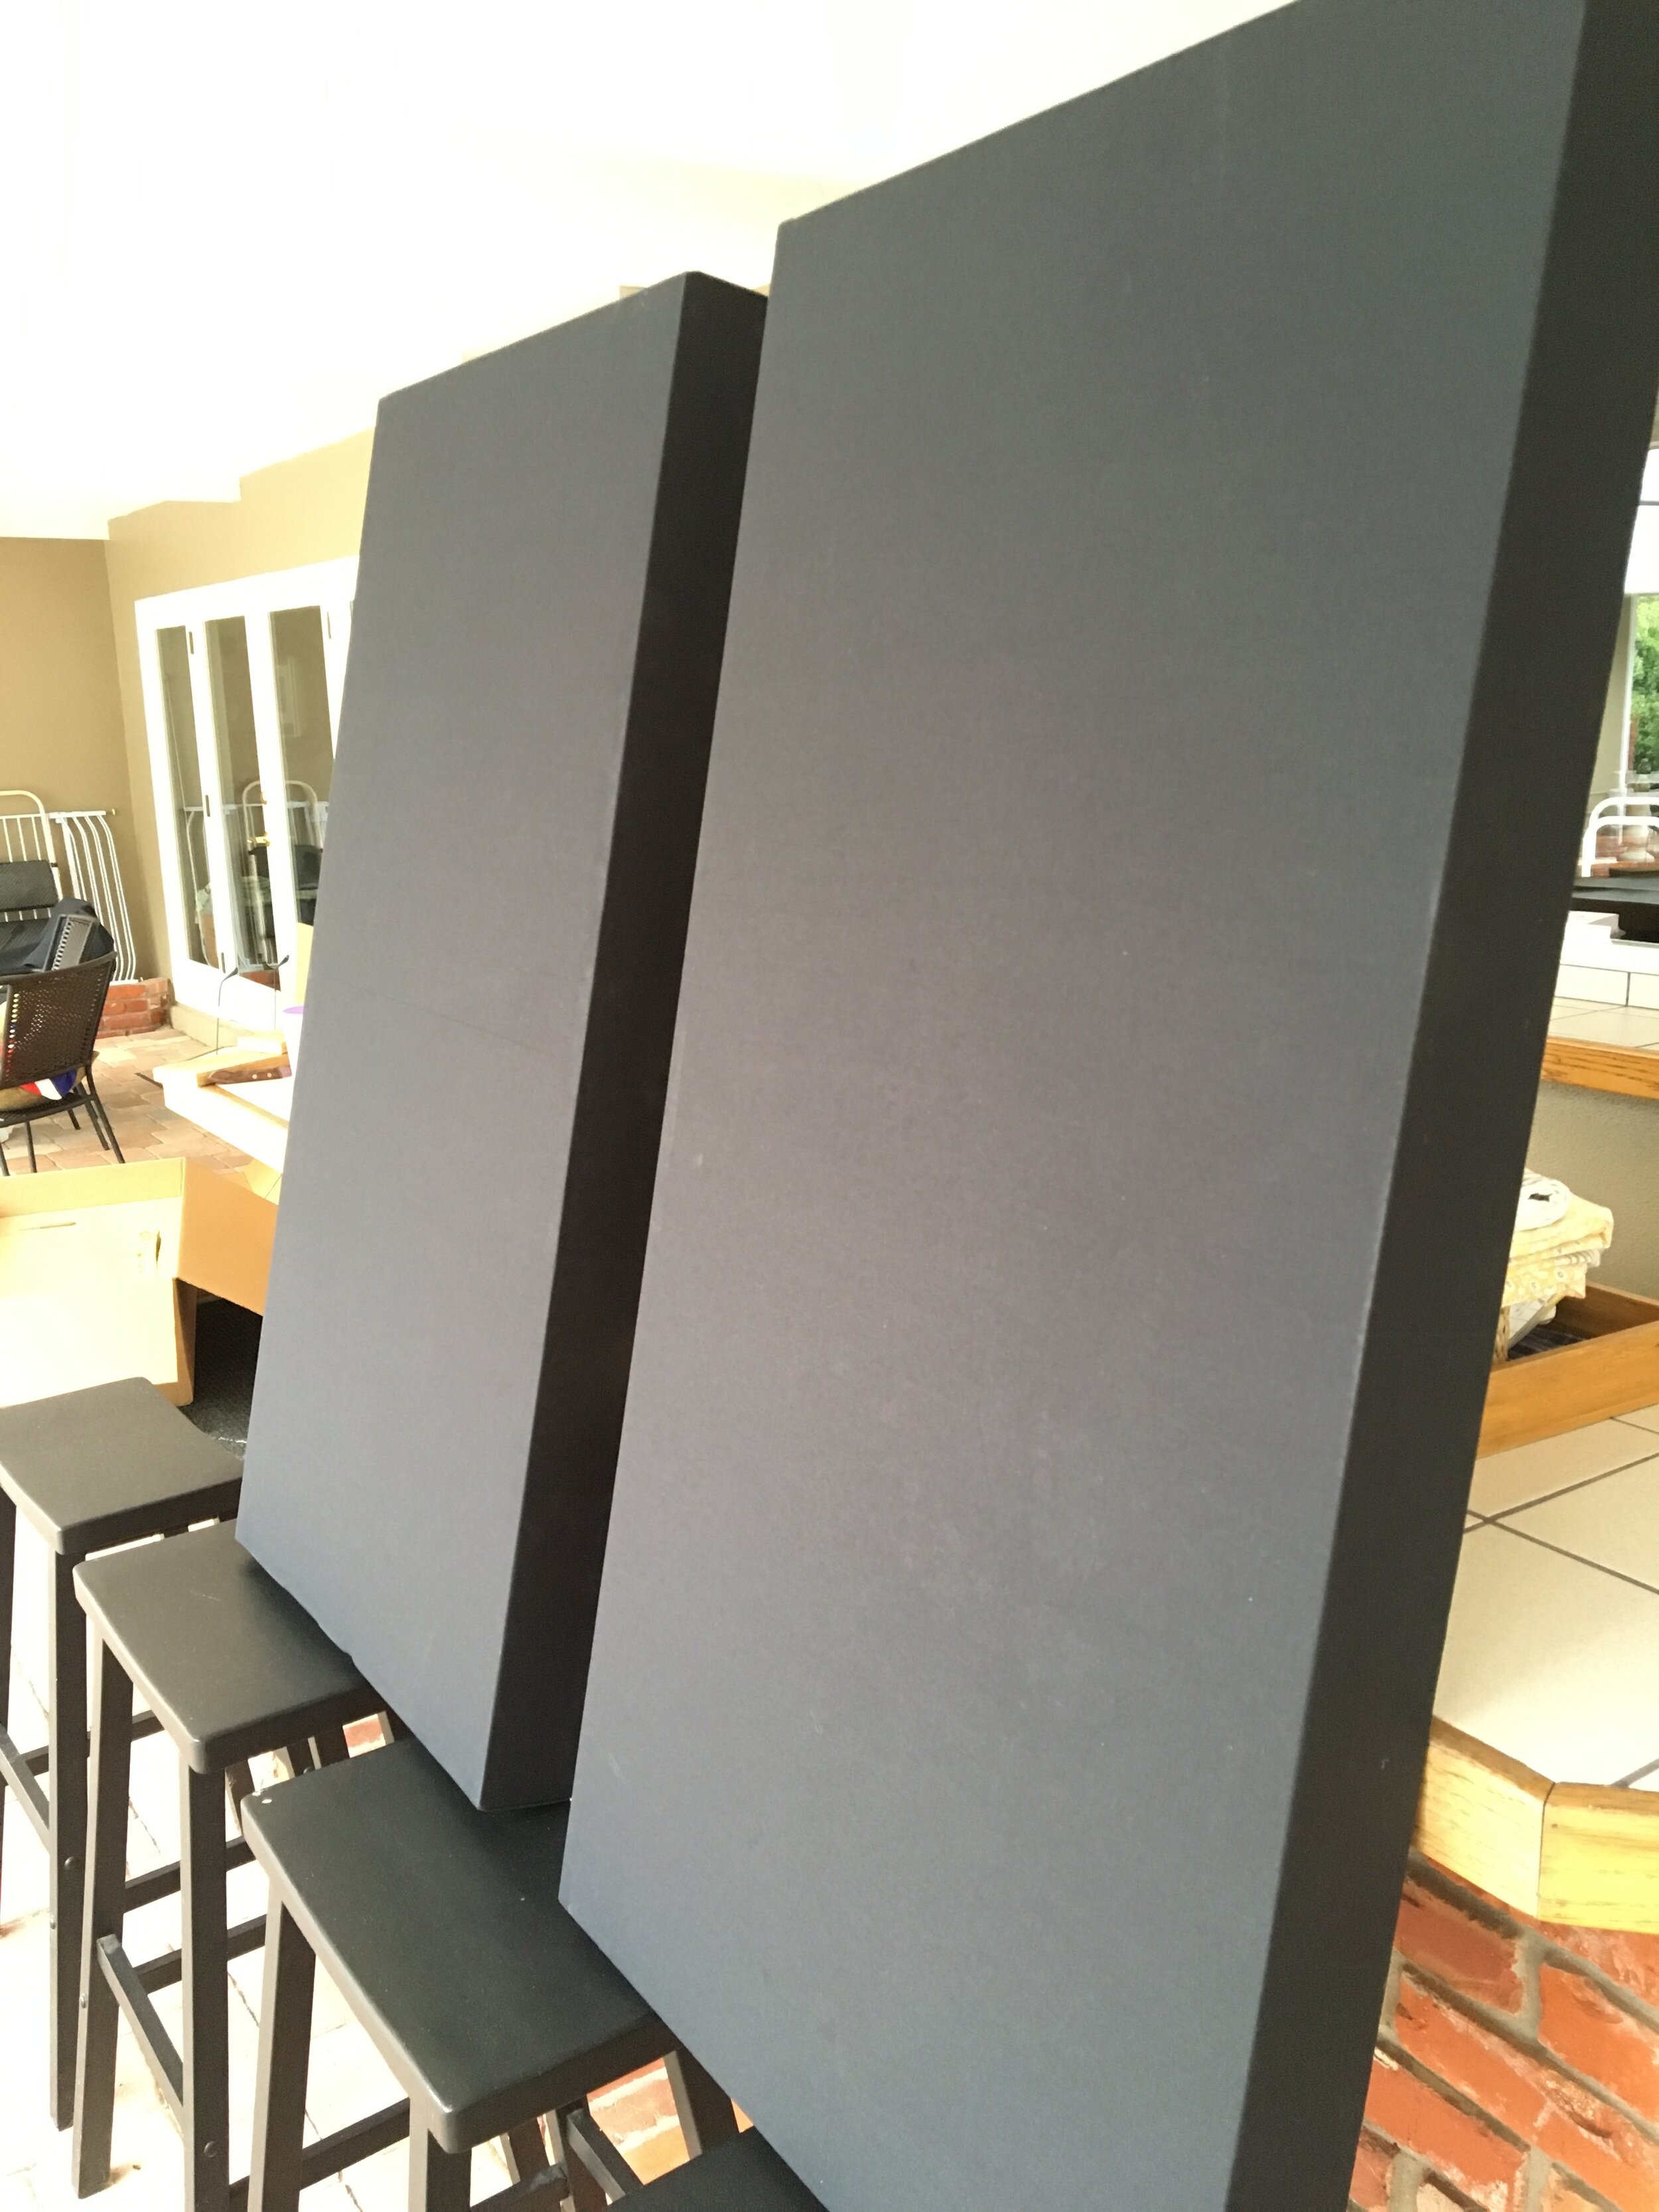
To hang these bad boys you can add Z-clip hardware or other hanging options like hook and eyes but I’ll leave that up to you. Generally standing them slightly off the wall will help with bass trapping so consider using Z-clips which will give you about an inch off the wall and a solid mount.
And that’s it ladies and gentlemen. You should have another beer or two left to celebrate so please admire your work and enjoy the reflection-less wonders of your new mix environment.